Wednesday, September 19, 2012

Warm Goat Cheese Salad


Summer time is here.  It may seem a bit odd considering its September but all of a sudden the fog has dissipated to make way for clear skys and bright sunshine. The locals tell me that the real summer in San Francisco occurs in September and October so while the rest of the country bundles up in warm sweaters, people here are breaking out their summer wear and enjoying the warmth, sparkling water, and the beauty that is San Francisco.

My mother, who arrived in late August has really noticed and appreciated the change.   She's a fantastic cook and has been cooking up a storm since she arrived (I'm thinking of just keeping her here :)  In California, there are farmers markets almost every other day, and there's a huge one that takes place every Saturday by the ferry building.  The old ferry building has been converted into a space which houses specialty stores - one's dedicated to mushrooms, another has dozens of cheeses, and there's even a kale product stand alongside a speicalty honey store.  Interspersed between about twenty of these unique stores are places to eat from sandwiches, desserts, and seafood, which you can enjoy walking around or right outside by the water.

Last Saturday morning, my mother went to the ferry building farmer's market and picked up fresh flowers, beets, sweet corn, lettuce, fresh berries, sourdough bread, and made a delicious brunch.   We had a beet salad with a yogurt sauce, healthy berry smoothies, corn which was boiled in milk - so sweet I can't even describe how good it was- and breaded goat cheese salad with fresh lettuce.  It was all fantastic and we devoured everything.

The breaded goat cheese salad was one of my favorite items and I discovered that it is really easy to make. Just arrange the fresh lettuce in a bowl, cut out circular pieces from sliced bread or baguette, put round pieces of goat cheese coated with bread crumbs on top, and broil it in the oven.  Once the cheese is a golden color, place them on the lettuce and drizzle it with a simple dressing.  Its delicious with the crunchiness of the leaves complementing the gooey tanginess of the warm goat cheese as you bite into it.    If you're looking for a simple delicious summer salad or a side dish this is perfect.

Recipe for Warm Goat Cheese Salad

Ingredients
8 oz goat cheese
Fresh lettuce
2 slices of bread
olive oil
Bread crumbs
Walnuts (optional)


Dressing
Balsamic Vinegar
Olive oil
Salt
Pepper

Directions

Wash and dry the lettuce leaves and place in a bowl

Slice 8 pieces of goat cheese and form into circles and dip them into bread crumbs.

Slice each piece of bread in half and then half again (4 pieces for each slice) and drizzle each side with a bit of olive oil.  You can cut around the cheese to make the bread into a more circular shape.

Place the goat cheese in the oven (or toaster oven) on broil until it turns a light brown color

While the cheese is in the oven add 2 tbsp of balsamic vinegar to 4 tbsp of olive oil with a pinch of salt and pepper and mix it into the lettuce.

Place the warm goat cheese on the salad once you are done.

Sprinkle with walnuts (optional)


Friday, August 10, 2012

Date Pie with Vanilla Ice Cream


Its Ramadan, the month of fasting that tests patience, discipline, and most of all appetite!  Once my body's adjusted to the routine I've never found it too tough to get through the month.  The hardest part, when I lived at home,  was waking up to family sehris at 4 or 5am.  I would never have much of an appetite (but was forced to swallow paratas and keema).  My goal was to get through the meal with half closed eyes, as little conversation as possible, and remain semi concious so that I could snooze before the morning alarm sounded for work.  Everyone else would be in the same sleepy state except for my father who would be wide awake and cheerful every morning and ready to tackle "light" issues such as economics, politics, and current world events.  Needless to say family participation was at an all time low!

In contrast, ifthar (when Muslims break their fast), is one of my favorite parts of Ramadan.  I love devouring samosas, pakoras, lukmis (hyderabadi large samosa), fruit chaat, dahi baree, the list goes on...I also love the fact that in Pakistan things tend to slow down, the mad shaadi hopping schedule is put on hold, and hanging out with family and close friends over numerous ifthars and dinners takes priority.

I've realized that Ramadan is not quite the same in the US and you'll never get to replicate the atmosphere in Pakistan but this year it has actually felt a bit like Ramadan.  People are getting together for ifthars and dinners and some of the traditional ifthari dishes are among the spreads.  One of my favorite fruits are dates and I tend to eat 4 or 5 at every ifthar.  I can't get enough of them!

A few weeks ago, Nadir and I spotted a post by my friend Aisha which featured a fabulous looking date pie.  I guess Nadir was craving it even more than I was and decided to make it for dessert a few days ago.

It was delicious.  The crust was crisp, the date filling inside gooey and sweet, and the scoop of vanilla ice cream dripping over the sides complemented it perfectly.  It encompassed Ramadan in San Francisco - a bit of datey Ramadan mixed into a western dessert.


Modified from this recipe (http://theyumblog.wordpress.com/2008/11/09/date-and-walnut-mini-pies)
Ingredients
For Pastry Crust
  • Buy readymade standard pie crust and bake in the oven until light brown before adding the filling.
For the Filling
  • Dates -  300 gms
  • Water –1/2 cup
  • Walnuts – 1/2 cup (chopped)
  • Lemon Juice – 2 tsp
  • Butter – 2 tsp
  • Cinnamon – 1 tsp
  1. After buttering and sprinkling flour over the pie dish, transfer pie crust into dish, brush with beaten egg, and prick all over with fork.  Bake in the oven  at 425 F for 10-15 minutes until light brown and let cool.  Turn oven down to 400 F.
  2. Melt butter in a heavy bottomed pan, add the dates and water and simmer until the dates are plump. Add cinnamon, walnuts and lemon juice and mix well.  Add more dates and water if you need more filling.
  3. Spoon in the date walnut filling into the crust.  Bake the pie at 400 F for 20-25 minutes until crust turns golden brown.
  4. Serve with vanilla ice cream


Monday, June 4, 2012

Tarragon Roasted Salmon with Creamy Avocado Sauce


I've been in California for about two months now and I thought as a tribute to the state I would make something with a creamy green buttery vegetable - yes, the one and only avocado!  I absolutely LOVE avocados and every market, grocery store, supermarket that I enter has a huge abundance of them.  I make salmon once a week but usually in the same style - dill crusted- so I was looking around for something new to try when the latest addition of the Bon Appetit magazine arrived at my doorstep with a glossy photo of  bright orange salmon on its cover.  I flipped through it and was pleasantly surprised at the 60 great light summer recipes inside.  Most were easy to assemble and perfect for the gorgeous weather that has graced San Francisco over the past few weekends.

The first few pages featured a recipe called "Poached Salmon with Avocado Sauce."  I decided to just grill the salmon as I normally do instead of poaching it.  Before putting it in the oven I salted the pieces generously, sprinkled some olive oil over the top, and covered them with a few pieces of fresh tarragon.  While the salmon was in the oven I scooped the flesh from two ripe avocados into a food processor adding yogurt, lime juice, cumin, and salt, and blended it together to form a delicious creamy avocado sauce.

After about 15 minutes I spread the avocado sauce across the bottom of the plate and placed the salmon on it.  The dish looks pretty with the orange tarragon speckled salmon contrasting nicely with the pastel green sauce beneath it.  The taste also does not disappoint; the flaky salmon with its hint of tarragon complements the butteriness from the avocado sauce beautifully.

If you enjoy avocados this is a great dish to make.  It only takes 20 minutes and has summer written all over it.

Salmon with Avocado Sauce  (Adapted From June edition of Bon Appetit Magazine)


Ingredients (for 2 ppl)


2 8-0z Salmon Fillets
A few tarragon leaves
2 ripe avocados
1 cup plain low or nonfat yogurt
1tbsp lime juice
1/2 to 1 tsp cumin (add a little to begin with and adjust to your taste)
1 tbsp olive oil
Salt

Directions


Preheat the oven to 375 degrees

Salt the salmon fillets generously, sprinkle with olive oil, and add a few tarragon leaves.  Put them in the oven once it has heated up.

Scoop out the avocados and add it to the food processor (make sure avocados are a bit soft from the outside or ripe).

Add the yogurt, lime juice, cumin, and a little salt and pulse until mixture becomes a smooth silky sauce.

Taste and add more salt and lime according to your taste.  I like a little tang so I usually add a little more lime.

Take the salmon out of the oven after 15 minutes or when it is done and place it on top of the avocado sauce.

Serve immediately.

Monday, May 21, 2012

Herb Roast Chicken


In the past few months I've been to Pakistan, packed up my NY apartment within weeks, moved to San Francisco, found an apartment in this ridiculously difficult market, bought furniture, and at long last moved and settled in - all a list of excuses for my hiatus from my food blog.  The cooking has continued even if the writing hasn't been as frequent and now I'm finally back with some new recipes!

Summer is fast approaching and people are looking to light, healthy, and simple dishes where they can enjoy the weather outside without having to spend too much time in the kitchen.  Roast chicken is a classic and is a great warm weather meal.  It was always a staple growing up and reminds me of countless lunches and dinners my family has spent around the table.  It also reminds me of childhood vacations in France where we would take long road trips, stop off at farmers markets, buy baguette, creamy cheeses, and a fresh rotisserie chicken, spread out our blanket, and devour it all in whatever beautiful setting we happened to be in.

Thinking it was fairly complicated, I never attempted the dish until recently, when I realized that it couldn't be simpler.  I bought a whole chicken from the supermarket,  already cleaned, with gizzards conveniently wrapped in a little packet that could easily be thrown away.  I salted it generously on both sides and melted two tbsp of butter which I massaged into the skin along with some dried herbs.  I then stuffed a whole onion with a few wedges of lemon (and herbs like rosemary are optional) into the cavity and tied the legs together with a string, and within 10 minutes I was done.  I like to have roast chicken with potatoes so I also pealed 6 potatoes and put them in the same pan as the chicken.  I put it in the oven for about an hour at 425 F and it came out moist on the inside, crispy and brown on the outside, and proved to be a completely satisfying and comforting meal to eat for dinner.  Carrot soup for starter followed by roast chicken and potatoes is now a regular feature on our dinner table.

Recipe


2-3 lb whole chicken (already cleaned)
1 small onion
1 lemon
1 sprig of rosemary (optional)
Dried herbs (rosemary, basil or whatever you feel like)
2 tbsp of butter
String for tying chicken legs
6 potatoes
Little flour for gravy

Directions


Preheat the oven to 425 F.


Rinse out the whole chicken and throw away the pack of gizzards.   Pat it dry and then salt generously.

Rub 2 tbsp of melted butter all over the outside and then sprinkle with dry herbs.

Stuff the cavity with a small onion and a few wedges of lemon along with a sprig of rosemary

Tie the legs together with a string

Peel 6 potatoes and put them in the same pot as the chicken

Put in the oven for about an hour and check to see if it is done.  If it still seems raw then leave it in for longer.

For Gravy


Take the chicken and potatoes out in a serving dish.

Scrape all the juices and remnants from the pan, add some water, and put it in a small pot on high heat.

Add a sprinkle of flour a little at a time while constantly whisking until it thickens.

Add more water until you have the amount and consistency you desire for the gravy.  Remember to keep whisking when adding flour so lumps do not form.


Wednesday, November 16, 2011

Mushroom Quiche with Butternut Squash Salad


One of my favorite dishes has always been mushroom quiche.  Growing up it was often lunch with a side of salad, part of dinner following a homemade soup, and inevitably in the center of a large spread when we had company.  It was probably one of the most versatile and popular dishes that frequented the dinner table.  At parties, the guests would devour it within minutes.  If there was a slice left over from dinner, it mysteriously disappeared by lunch the next day.

I always thought this delicious quiche was very complicated to make.  Not so.  While scouring quiche recipes last week I found that most of them were fairly simple and I was encouraged enough to replicate the one from home.

Last Friday was a busy day and by evening we didn't have the energy to go out for dinner.  I wasn't in the mood for greasy takeout and I really didn't feel like spending much time in the kitchen so mushroom quiche seemed like the perfect solution.  The key to making this recipe easy is to buy a ready-made crust from the supermarket and keep it in the freezer until needed.  All I had to do was unroll the pie crust into a baking dish.  I sauteed a diced onion  with some mushrooms in olive oil.  In a bowl, I beat three eggs, added some milk, and salt and pepper for seasoning.  I then poured the mushroom mixture onto the crust and topped it with the egg mixture.  I finished it off by sprinkling some freshly grated gouda cheese on top and then baking it in the oven.

Assembling the pie and cooking the mushrooms took all of five minutes.  When it came out of the oven, only 30 minutes later, the pie smelled delicious.  To accompany it I quickly whipped up a butternut squash salad.  I took a box of peeled and diced squash out of the fridge, added some maple syrup and a sprinkle of olive oil, and let it bake alongside the quiche for 30 minutes.  Once it was soft, I added it to a bowl of mixed greens and sprinkled it with mustard dressing.

That night we had an episode marathon of MI-5, my new favorite show.  For those who enjoy action packed conspiracy-filled and highly entertaining plots, this one has a twist at every turn.  Watching those episodes lazily on the sofa while digging into the rich quiche with creamy gouda cheese, we partially redeemed what could have been a very sad weekend night.

Here is the recipe.  Its a great meal thats simple, quick to make, and perfect as an emergency dinner for a movie night.  If you're a fan of mushrooms you'll love it!

Recipe for Mushroom Quiche


Ingredients
1 ready made pie crust
1 onion
1 pound sliced mushrooms
1 cup grated gouda cheese (or you can substitute another)
1 cup whole milk
3 eggs
salt and pepper

Directions


Take out the pie crust beforehand and let it thaw before placing it in the pie dish.  Bake it in the oven for about 5-7 mins (or follow the directions on the pack)

Dice the onion and sautee in a pan until it becomes translucent.  Add the mushrooms and let it cook for 5 mins seasoning with salt and pepper.

Beat 3 eggs in a bowl, add the milk, and season with salt and pepper.

Grate a cup of gouda cheese and keep aside.

Add the onion and mushroom mixture to the semi-baked crush and spread it on the bottom.

Pour the egg mixture over and then sprinkle on the cheese.

Put the quiche in a preheated oven at 375 F for about 30 minutes.  Check after 20 mins periodically to see if it is done.  If the knife comes out clean from the center then its ready to serve.


Sunday, October 30, 2011

Pumpkin and Black Bean Soup


It is that time of the year again- cleopatras, darth vaders, draculas, and even a few Gaddafis, roam the streets.  Skeletons hang in windows.  Parents raid candy stores.  Pumpkins, in all forms, await trick or treaters, with creepy smiles.

Halloween has hit in full force.  On Saturday, despite the snowstorm, with gusty winds and and pelting hail, the subways were crammed with party goers determined to make the most of Halloween night.

Preparations had started weeks in advance.  Walking around Manhattan, every neighborhood, had its own array of pumpkins, creatively displayed, sitting outside their doorsteps.  Having seen so many of them around, and in anticipation of the miserable weather on Saturday, I was inspired to make a hearty pumpkin soup.  When I stumbled into the apartment late last night - shivering, soaked to the bone, unable to feel my fingers, the soup followed by some hot chocolate, soon had me feeling warm and revived.


Rather than making a conventional pumpkin soup, which can sometimes be a bit bland, I opted to for a version I had found on one of my favorite food blogs, Smitten Kitchen (www.smittenkitchen.com).  Its a black bean pumpkin soup where the beans are pureed with some tomatoes, to which pumpkin puree is added, and then simmers in beef broth for about half an hour.  You can garnish it with some pumpkins seeds at the end.  I didn't have any so I used toasted pine nuts which gave it a great nutty flavor.  The soup, with some bread on the side, can make for a really hearty meal on its own.

I know its a big jump to go from the shrimp potato light lunch, of my last post, to a heavy, but delicious, winter soup, but my cooking is just mirroring the weather; a few days ago it was fall weather with a pleasant briskness, and overnight the temperatures dropped about 10 degrees.  Sadly, it seems NY has forgotten the autumn season, even the leaves are confused; green, on the verge of orange, and now, before they've had a chance to turn, the first snowfall has pummeled them.

Anyway, I think this bodes for a long cold winter ahead, so there are probably a few more soup recipes on the horizon.  Fresh homemade soups are always a good staple in cold weather; they're fuss free dishes, take half an hour to make, and warm you up from the inside on those brutally cold days.


Black Bean Pumpkin Soup Recipe (Slightly modified)
Gourmet, November 1996

(serves 4)

Ingredients
One 16 ounce can black beans, rinsed and drained
1 cup drained canned tomatoes, chopped
1 chopped onion
4 garlic cloves minced
1 tablespoon plus 2 teaspoons ground cumin
1 teaspoon salt
1/2 teaspoon freshly ground black pepper
olive oil
4 cups beef broth
24-ounce can pumpkin puree (about 1 1/2 cans))
Garnish: sour cream and coarsely chopped lightly toasted pumpkin seeds

Directions
In a food processor coarsely puree beans and tomatoes.

Cook onion, , garlic, cumin, salt, and pepper in olive oil over moderate heat, stirring, until onion is softened and beginning to brown. Stir in bean puree. Stir in broth and pumpkin, until combined and simmer, uncovered, stirring occasionally, 25 minutes, or until thick enough to coat the back of a spoon.

Season soup with salt and pepper.

Serve soup garnished with sour cream and toasted pumpkin seeds.


Monday, October 24, 2011

Rustic Shrimp and Potato Dish


About two weeks ago, we had a "summer" weekend, a burst of sunshine, a last chance to soak in heat, greenery, and the outdoors, before the brisk chill set in.  And has it set in. My wool sweater, knee high boots, and protective raincoat, sadly replaced my light cotton wear, sometime last week.

Anyway, back to that weekend.  Everyone in NYC instinctively knew this was the last beautifully warm day of the season, and every New Yorker, determined to make the most of the 80 degree weather, had planned to spend it outdoors.  Nadir and I were no exception.  Instead of lazily spending the morning in bed, we hastily made our way to the supermarket, bought the ingredients for a picnic, had cooked and assembled it within an  hour, and donning our fedora hats, were on our way to Central Park by early afternoon.

Not surprisingly, when we reached Sheeps' Meadow, at the park, the whole of New York had the same idea.  The sprawling grassy area was filled with New York's finest; hipsters, wearing their tight jeans and funky glasses, Wall Street types, in their polo shirts and khaki shorts, children running around happily, students with books left untouched, and dozens of people like us, with packed lunches, people watching, reading, and dozing on and off.

It was an afternoon of relaxation.  Nibbling on the garlic shrimps, digging into the tangy potato salad, dipping it into the zesty yogurt sauce along with slices of baguette, we thoroughly enjoyed the light, delicious, and easy to assemble lunch.  The shrimp and potato meal was inspired by a cooking show from a  few days earlier.  Jamie Oliver, a lively British chef, who talks a million miles a minute, cooks wonderful rustic dishes, in his country home in the UK, often using fresh ingredients from his own garden.  One episode featured a meal of smoked salmon, topped with homemade potato salad, showered with fresh herbs, and sprinkled with a horseradish creme fraiche sauce.  I'm not a big fan of smoked salmon so I substituted it with shrimp and as a healthier option used greek yogurt as a base for the sauce.  The combination worked well.

This dish is worth trying.  Its a great summer lunch but works in autumn as well, especially if you want something light.  The best part is that it takes very little effort and produces great results!


Rustic Shrimp and Potato Salad Recipe (Modified from Jamie Oliver's Salmon and Potato recipe)

Ingredients
• 1 1/4 pounds new potatoes, washed
• sea salt and freshly ground black pepper
• zest and juice of 1 large lemon
• a splash of  vinegar
• extra virgin olive oil
• 2 tablespoons capers, soaked and drained
• 12 tablespoon wasabi in a jar, to taste
• 6 oz nonfat greek yogurt
• a small bunch of fresh dill
• 1 lb or 3/4 lb shrimps (deveined)


Directions
Pick out the larger potatoes and halve them, making them roughly the same size as the smaller ones. Put all the potatoes into a pan of boiling salted water. Boil for 15 to 20 minutes until the potatoes are just cooked, and drain in a colander. Put the lemon zest and half the lemon juice into a bowl and add the vinegar. Normally, when making a dressing, I stick to one type of acid, but in this case using vinegar and lemon juice together gives the dish a lovely zinginess. Pour in three times as much extra virgin olive oil as vinegar, and add the capers. Season the dressing with salt and pepper. Mix everything well, then add the warm potatoes and toss around until they are all well coated.

Mix the wasabi paste into the crème fraîche with the remaining lemon juice and some salt and pepper. Sprinkle most of the dill over the cooled potatoes and toss again.

Sautee the shrimp in some olive oil and garlic for two minutes.  Don't overcook.  Lay them out on a big plate or platter. Don’t be too neat – I want you to make it look rustic!  Pile the dressed potatoes on top. Dollop over wasabi yogurt sauce, drizzle with some olive oil and sprinkle over the rest of the dill

Served with some nice bread, this makes a delicious lunch.


Tuesday, September 20, 2011


Chicken Fettuccine with Homemade Pesto


Click on the photo to see a larger image


It was not intended to be, but last weekend was shrouded in red, white, and green.  Yes, Italia. Starting with delicious thin crust pizzas at our favorite pizza joint, Luzzos,on Friday.  Stopping off at the San Gennaro street festival for lunch ,on Sunday.  And ending appropriately with a dish of pesto chicken fettuccine for dinner later that night.

San Gennaro is really my kind of festival.  For me, the appeal of street fairs is all about the food.  This one was callled the "Annual Feast of San Gennaro" and was it a feast!  There were lines of food stalls offering up fresh seafood, chicken parmesan, pastas, pizzas, calzones, italian cookies, biscotti.  Anything remotely Italian was featured in some way along the ten block walk.  I was in heaven.  After scouring the stalls, I finally settled on a chicken parmesan sandwich swimming in a rich tomato sauce.  I couldn't decide on which of the hundred beckoning desserts to try until the owner of an ice cream stall offered me a taste of his refreshing mango gelato. I was sold!

The San Gennaro Festival


That night, inspired by the Italian goodies I had experienced, I decided to make pesto chicken fettuccine.  The day before, Nadir and I had gone to a farmer's market and picked up a variety of vegetables and herbs including a bushel of basil.  We later stopped off at a specialty food store called Eataly (yes a play on the word 'Italy' as everything in the store is Italian).  Its a great store because it has a restaurant in every section of the store.  For example, where I was browsing for pastas, there was a pizza and pasta place, and in the cookie section there was a dessert and coffee counter.  Anyway, we picked up some fresh pasta where we could see a woman making it from scratch beside the counter and took it home.

Fresh Pasta at Eataly


Italian food is fairly simple.  For pastas, its usually served with pesto or marinara sauce, and some sort of vegetable or meat.  What makes some better than others is the quality and freshness of the ingredients.  I combined the basil from the farmers market with some toasted pine nuts, garlic, olive oil, and some salt and pepper to taste, to make a fresh pesto.  I then sauteed some chicken in a pan with garlic, paprika, and salt.  While the chicken was cooking, I put the fresh pasta in some boiling water and let it cook for about 8 mins.


Homemade Pesto


Once the pasta was done I drained most of the water except for a cup which I reserved for the sauce.   I added the pesto to the chicken and slowly added about half a cup of water to make the pesto into a sauce (careful not to make it too watery).  I then grated some parmesan cheese onto the chicken and added the fettuccine to the pan coating it well with the sauce.

It was really good!  The taste of the pesto was so much better than the store bought stuff I had used previously.  The basil flavor really came out in the dish and the fresh pasta made a huge difference.  I almost felt like I was eating in Italy.  To add a bit of crunch I toasted some pine nuts in a frying pan and sprinkled it over the pasta along with some fresh basil and grated parmesan cheese.

Recipe for Homemade Pesto


Ingredients
2 cloves garlic
2 cups fresh basil
1/3 cup toasted pine nuts
1/2 cup grated parmesan
2/3 cup olive oil
Pinch of salt and pepper

Put the garlic, basil, and pine nuts in a blender and pulse to combine.  Slowly add the olive oil while the blender is running.  Add the parmesan at the end and pusle a few times.

Recipe for Chicken Fettuccine with Pesto

Ingredients
1 lb chicken breast cut into small cubes
1 lb fettuccine
1 cup pesto
1/4 cup toasted pine nuts
Parmesan cheese
Salt and pepper
Garlic powder
Paprika

1)Put a pot of water to boil on the stove.  Season the chicken with salt, pepper, garlic powder, and paprika, and saute in a pan until the it is cooked through.

2)Add the fettuccine to the boiling water while the chicken is cooking.  Once the pasta is done keep a cup of the pasta water and drain the rest.

3)Drain the liquids from the chicken and add the pesto.  Keep the heat low.  Add the pasta water a little at a time until the pesto sauce is the consistency you desire.  1/2 a cup or a little less for one cup of pesto should be enough.

4) Grate some parmesan cheese into the sauce before you add the fettuccine so when you mix it, the cheese melts and sticks to the pasta.

5) Add the fettuccine and mix well to coat ensure all the pasta is well coated with the pesto sauce.  Sprinkle some toasted pine nuts on top and some fresh basil on top before serving.


Monday, August 8, 2011

Chicken Korma


Its Ramadan time again. Ifthars with pakoras, samosas, fruit chaat, doodh pati chai. All this followed by pulaw, salans, bhujiyas....those from Pakistan will definitely be able to relate. Its one of the great parts of being home; the bountiful fried foods to break your fast and the huge feast that follows. The best part is that you don't have to make any of it. It just magically appears on the table waiting to be devoured.

On the other side of the world in New York, with its 90 degree humid days and 16-hour food-less rozas, the prospect of Ramadan doesn't seem half as exciting. In an effort to make it feel a little more like home I've revisited the tattered book of delicious recipes my mother had given me. To say she is a spectacular cook is an understatement.One of my favorite recipes from this little notebook is chicken korma. It is hearty, flavorful, swimming in curry, and extremely satisfying when you haven't eaten all day. It takes a while to make but its worth every minute. We ate it hungrily the first night and we had enough leftovers for dinner the following night as well. It sometimes tastes even better the second day because the flavors have had more time to set.


To make the korma you have to marinate the chicken with garlic and ginger. Separately grind a few ingredients like almonds, fried onions, and coconut and add it to the yogurt to form the basis for the sauce. The chicken is cooked with the yogurt to form a rich hearty curry. The actual recipe is below in more detail.

Batool's Chicken Korma Recipe

1 Chicken cleaned and cut up into whole pieces like leg, breast(with the bone)
2 tsp garlic paste
2 tsp ginger paste
600g plain yogurt
handful of cocunut
32 pealed almonds
2 handfuls of ready fried onions
1 tsp salt
1/2 tsp red chilli powder
1/4 tsp tumeric powder

Directions

Coat the chicken with garlic and ginger and leave it in a dish to marinate

Heat the coconut in a pan until it is slightly brown and crusted. Then heat he almonds in a pan to crust it as well. Separately grind the fried onions, coconut, and almonds in a food processer until very fine. Mix them into the yogurt one at a time.

Add oil to a pan and once it is hot add the tumeric, chilli powder, and salt and stir. Immediately add the chicken and let it brown for 5-7 mins on high heat. Add 1 1/2 cups of water to the chicken and put it on low heat until most of the water evaporates.

When there is about an inch or two of curry mixture, add the yogurt. Add another cup of water and mix for about ten minutes. Let it cook for a while until it starts to become brown. Add another 1/2 to one cup water as it becomes thicker and starts to brown. Let it cook until the curry is the consistency you desire and has a rich brown color (for me it was another 30-40 mins).

Sprinkle some freshly cut cilantro at the end to garnish the dish.


Tuesday, August 2, 2011

L'Entrecote


Whenever I think of steaks my mind immediately drifts back to delicious dinners at L'Entrecote St Jean in Montreal. As students, we would occasionally treat ourselves to soup, steaks, and profiteroles at this charming French bistro. We would walk down Peel street in negative 40 degree weather with icy pellets hitting our face and gusts of wind that almost swept us off our feet, and stumble into this bistro with relief. The first thing to hit us was its warmth; the welcoming mahogany interior, the unpretentious one item menu, and the appetizing hearty soup that defrosted our insides.

Recently, I had dinner at the original Le Relais de Venise L'Entrecote in Paris which I suspect the Montreal one is modeled after. It is almost exactly the same. The ceaser salad with the light vinegar dressing is a perfect starter. The thin slices of strip steak are tender and swimming in a fantastic sauce. The sauce is what stands out to me in all these restaurants because it is rich, buttery, and plentiful. The fries on the side aren't your run of the mill potato wedges but very finely cut crispy and steaming hot "french" fries. Just as I was satisfyingly leaning back in my chair after having devoured the steak frites, the server came back with a second round of strip steak and bountiful crispy fries. To say that I was stuffed by the end would be an understatement. There was, however, room in the dessert compartment of my stomach for some more. I'm glad I didn't skip it because what arrived was a towering dessert with alternate layers of meringue and ice cream dripping with chocolate sauce. It was divine...


Last week we discovered that there was a Le Relais de Venise L'Entrecote in New York. We were there the next night and experienced Paris all over again. Apart from the strong New York accents everything was the same. The interior had the same decor, the steaks with the deliciously crispy fries lived up to our expectations and the decadent profiteroles for dessert ended the meal on a decidedly sweet note.

Having tried this restaurant in three different cities, I can safely recommend it. Its not your sophisticated best cut lightly marinated steak, but it is delicious, for those who enjoy a good sauce, thinner leaner pieces of meat, and a convivial atmosphere. If you're in Paris, New York, or Montreal, stop by. You won't regret it.


Friday, July 22, 2011

Mediterranean Pasta


I have returned to blogging after a summer of complete gluttony. My siblings were visiting New York for a month and then we were off to Paris for another few weeks. The word of the season was 'food.' We squeezed in some culture with plays and exhibitions but we made sure that these activities included pre-museum lunches and post theatre desserts. The meals ranged from Shake Shack burgers and Peter Luger steaks, to one star restaurants in Paris, and decadent desserts at Pierre Herme. As a result, I think I've cooked a handful of times in the past few months and sampled a good number of restaurants in both cities. Having finally returned to New York "sans famille" and thus reality, I've dusted off my pans and started cooking again. It feels good.

Yesterday, I was in the mood for seafood because of some delicious meals I had over the summer. One was an amazing dish at a buzzing restaurant called Jane. The dish, aptly named 'Jane Benedict', is decadent, with a base of crab cakes topped with poached eggs where the yolk oozes out to enhance the rich hollandaise sauce it is topped with. I know, for some, it sounds odd, but trust me it is to die for! The other, was an absolutely amazing fish we had at an Asian restaurant called Kittichai (see below)


I knew I couldn't replicate those crab cakes or the fish so I opted for a much easier seafood dish made with shrimps. I decided to use some Mediterranean flavors such as cherry tomatoes for a pungent flavor, onions for crunch, basil, and some balsamic vinegar in the sauce to give it a kick. First I put two boxes of cherry tomatoes in a pan with some olive oil until they started to pop, then I added some chopped onion with garlic, salt, pepper, and balsamic vinegar to the pan and stirred it until it became a sauce adding the shrimps at the end. In the meantime, I had boiled some whole wheat spaghetti (you can use any pasta you like), which I added to the pan with the sauce and some pasta water. I sprinkled it with some basil leaves for flavor and we were done. It was simple, delicious, and flavorful. I would definitely recommend it and if you have some cheese laying around you can finish it off with a few shavings of parmesan.


Recipe for Cherry Tomato Shrimp Linguine (from the Noshery blog http://thenoshery.com/2010/04/13/cherry-tomato-shrimp-linguine/)

Cherry Tomato Shrimp Linguine (Serves 2)

  • 5 oz dry linguine (or spaghetti)
  • 3 Tbs olive oil
  • 10 oz cherry or grape tomatoes
  • 1/2 large red onion, chopped
  • 3 cloves garlic, minced
  • 1/2 Tbs balsamic vinegar
  • salt and pepper to taste
  • 24 large deveined and peeled shrimp
  • fresh basil

Bring a pot of salted water to boil. Cook pasta until al dente.

While the pasta cooks heat a skillet with 3 tbs of olive oil at medium high heat. When the oil is nice and hot add 10 oz of cherry tomatoes and stand back. If you have a spatter screen you may want to use it. Fry the tomatoes until they start to pop. Add salt, pepper, garlic, balsamic vinegar and red onions to the skillet. Stir the until onions are tender and tomatoes are soft, about 10 minutes.

Add shrimp to the skillet. Cook until the shrimp is pink and begins to curl. Add cooked linguine and toss until evenly coated.

If you have fresh basil tear it and add to the pasta and toss.


Thursday, March 24, 2011

Spring Strawberry Spinach Salad


Now how's that for a tongue twister. Try saying it ten times fast.

Luckily its a little easier to make than it is to say...

I tried this salad almost a year ago when my sister was in town visiting. I really didn't think I would like it because strawberries and salad seemed like a weird combination. After much coaxing, I finally did, and to my surprise, I loved it! So much so, that when I lived in San Diego it became part of my lunch staple where the strawberries are seriously in a league of their own.

Chopping up strawberries, adding them to a bowl of baby spinach, tossing it all with a balsamic vinegarette, and then topping it with toasted pine nuts takes literally all of five minutes and makes for a delectable combination. The best part is that it's healthy, low in calories, and the perfect dish to make in spring.

Note that I've named this the Spring Strawberry Spinach Salad. Spring has supposedly begun but with the snow thats hit NY for the past two days we still haven't given up our winter coats. I'm hoping by including some light fresh spring recipes I'll be able to encourage the good weather to move in quickly. We're all a bit tired of heavy winter foods and ready to trade in the winter squash for flavorful strawberries, cherries, and apricots!

Try it out. It'll brighten up your day even if the weather refuses to do so....

Recipe for Strawberry Spinach Salad

Serves 2

Ingredients
1 pack of strawberries (about 15-20 strawberries)
1 pack or 3 cups of baby spinach
1/4 cup toasted pine nuts

Dressing
3 tbsp olive oil
1.5 tbsp balsamic vinegar
salt
pepper

Directions
Pour baby spinach into a salad bowl. Dice each strawberry in half and add to the spinach. Mix together the olive oil and balsamic vinegar in a separate bowl and add a pinch of salt and pepper. Mix in the dressing and then add the toasted pine nuts last for a bit of crunch.

Thursday, March 10, 2011

Simply Salmon


We've all had those days where we're too tired to cook, not in the mood for greasy takeout chinese, and hope that if we procrastinate long enough a delicious, preferably healthy, meal may magically appear on the table. I've done this a few times and I've sadly discovered that there's no food fairy godmother.

All is not lost because I've discovered a go-to meal that has a three minute prep time, is healthy, and most importantly tastes delicious. I actually disliked salmon before I tried this dish and now I'm converted. Its that good!

Melt about 2 tbsp of butter in a bowl, add a cup of breadcrumbs along with some dill, and some salt and pepper for seasoning. Mix it all together and layer it on top of the salmon. Bake in the oven for about 20-30 mins if the pieces are thick (less if they aren't). The result is deliciously flaky salmon complemented by crunchy dill flavored crust. The butter incorporated in the bread crumbs gives it a beautiful golden brown color when it comes out of the oven.


Yesterday had been an exhausting day for both Nadir and I. We sat down to dinner at almost 10pm and devoured this meal. It was both quick and completely satisfying. Try it out. Its worth those three minutes....


Adapted from Claire Robinson's Herb Crusted Salmon Recipe


Ingredients

  • 1 cup fresh bread crumbs
  • Kosher salt and freshly cracked black pepper
  • 1 tablespoon roughly chopped fresh dill
  • 2 to 3 tablespoons butter, melted, plus 1 tablespoon
  • 4 center-cut salmon fillets

Directions

Preheat the oven to 400 degrees F.

Melt the butter in a bowl, then add the bread crumbs, salt and pepper, and finally the dill. Mix together with a fork.

Pat the salmon dry and season on all sides with salt and pepper, to taste. Top each fillet with the herb/crumb mixture. Put the pan in the oven and bake until the fish flakes with a fork. About 20 minutes. Transfer the fish to a platter and serve immediately.


Friday, March 4, 2011

Anniversary Dinner - Tender Succulent Short Ribs..


Now, if that title didn't entice you, then there's not much that will. I rarely spend hours slaving over a meal in the kitchen but once in a while an occasion comes along where you just want to make something that will knock someone's socks off...namely, a first anniversary. I had toyed with the idea of going out to a romantic restaurant but as our main pass time is checking out places to eat, I thought this would be something a little more memorable.

Speaking of romantic restaurants, a few weeks earlier, we had dined at a classy place called Prado, in San Diego, set in the middle of a beautiful park. I ordered duck which was amazing but I looked over at Nadir's huge short ribs and took a tentative bite. The tender meat just fell off the bone and proceeded to melt in my mouth. Needless to say, a few minutes later, the short rib dish was in front of me and the duck had mysteriously made its way over to Nadir :)

With the memory of those short ribs still fresh in my mind I started looking online for recipes. A lot of them seemed pretty complicated and entailed leaving things overnight and cutting up hundreds of vegetables. I finally decided on a pretty simple recipe by Paula Dean. . I seasoned the short ribs with salt and pepper and seared them in olive oil and garlic. I then added some beef broth and water and brought it to a boil. Afterwards, I put everything in an oven proof pot with a lid, adding onions and seasoning and let it cook for 2 1/2 to 3 hours in the oven. The short ribs aren't hard to make they just take a while to cook.

While they were in the oven I made some mashed potatoes, mushrooms, and salad to go along with them. I pulled the short ribs out of the oven once Nadir was home and, hands down, it was one of the best dishes I've ever made. The meat was so tender that it just flaked off the bone. The gravy was hearty and flavorful and the creaminess of the mashed potatoes alongside the butter coated mushrooms complemented the meal perfectly. This isn't a meal you'll be making weekly but when you want to pull out the big stops, keep this recipe in mind. Its definitely worth it.


Recipe for Short Ribs by Paula Dean

Ingredients

  • 3 pounds short ribs
  • House Seasoning, recipe follows
  • 2 tablespoons all-purpose flour
  • Oil
  • 2 cloves garlic, chopped, plus 2 more cloves chopped
  • Water
  • Beef Broth, plus more for roasting
  • Salt and freshly ground black pepper
  • 1 onion, sliced
  • White rice, for serving

Directions

Preheat oven to 350 degrees F.

Season ribs liberally, or to taste, with House Seasoning. Lightly dust with 2 tablespoons flour. (I skipped the flour part)

In a Dutch oven, place a small amount of oil. Add the 2 garlic cloves and cook until lightly browned. Add the ribs and brown on each side. Add half water and half beef broth to cover ribs. Bring to a boil. Remove the ribs from the Dutch oven and place in a casserole dish (I used a pot which had a cover that I left on while it was cooking in the oven. I highly recommend you do this). Add the remaining garlic, salt and pepper, onions, and about 1 cup broth to the ribs. Roast ribs for 2 hours. Serve over buttered white rice.

House Seasoning:

1 cup salt

1/4 cup black pepper

1/4 cup garlic powder

Combine all ingredients in a bowl.

Wednesday, December 1, 2010

Thanksgiving and Pumpkin Pie


I've never embraced the Thanksgiving holiday but I think its because, until last weekend, I hadn't experienced a true Thanksgiving meal. For the six years of my life that I've actually spent in N. America, I've loved Thanksgiving for all the wrong reasons, namely, the opportunity to get away to warmer climates when I was in DC, and even more so, when I was freezing away in Montreal.

The first surprise came when I went to pick up the turkey. I assumed, for some reason, that turkeys were slightly larger than chickens. I discovered how wrong I had been as we lugged the 20 lb monster-of- a-bird back to the car and dropped it into the trunk. I'm going to stick in a picture of Nadir preparing the turkey just to show you what I'm talking about. (Side note: the turkey he made was amazing).


I was in charge of dessert for the Thanksgiving meal so I went online and found a non-traditional pumpkin pie recipe. I've never even tried a pumpkin pie or dessert but I figured from the 600 positive reviews listed , there had to be something to it.

Luckily, a week earlier, I had frozen some fresh pumpkin puree which I thawed out and mixed with some eggs, butter, cream, sugar, vanilla essence, and a touch of cinnamon. I poured the mixture into a premade crust which had been in the oven for about 20 mins (see below) and was beginning to brown.


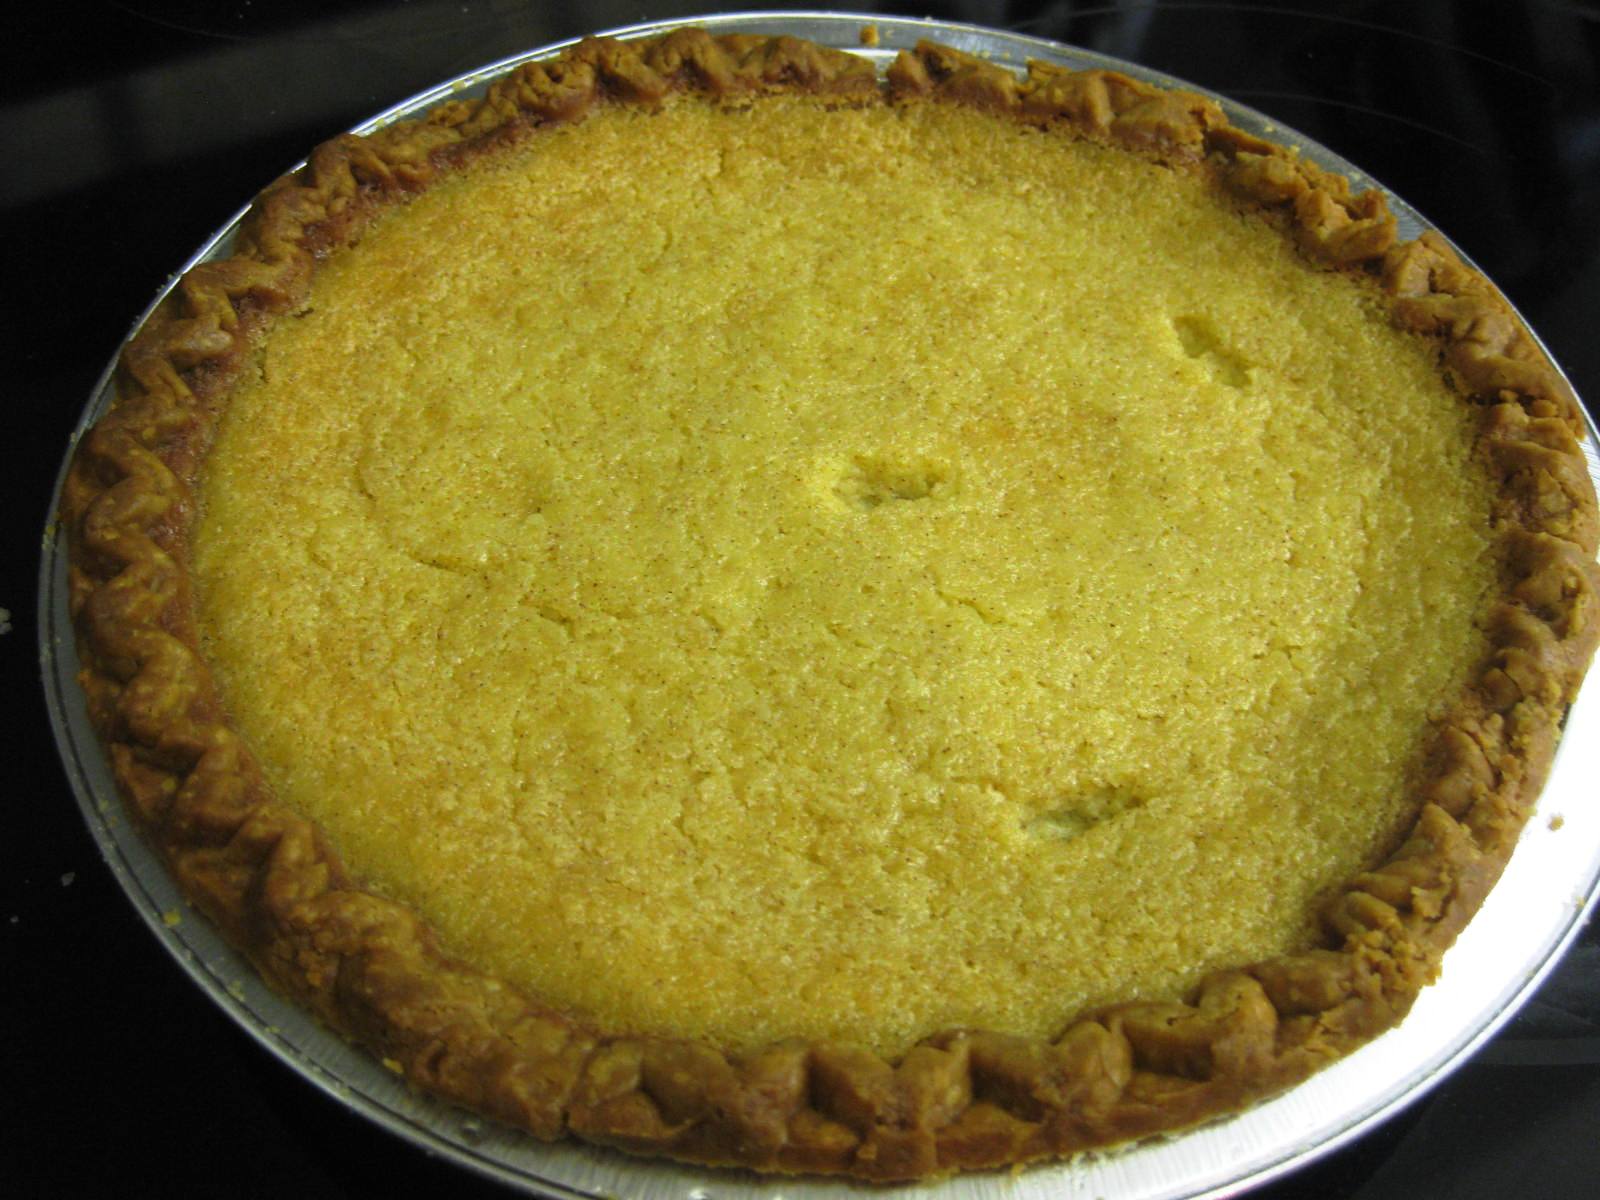
I left the pumpkin pie in the oven for about 65mins (a little longer than the recipe requires) and took it out to cool once it had set. The pumpkin is more yellow than orange which can be attributed to the fresh pumpkin puree I used over the canned. It looked and smelled delicious.


After leaving it in the fridge overnight I served it at the Thanksgiving dinner with some cream. It was all gone within 20 minutes. I have a different take on Thanksgiving now; its about family and more importantly it completely revolves around food. There's a combination thats hard to beat!


Paula Dean's Pumpkin Pie Recipe

Ingredients

  • 1 (8-ounce) package cream cheese, softened
  • 2 cups canned pumpkin, mashed
  • 1 cup sugar
  • 1/4 teaspoon salt
  • 1 egg plus 2 egg yolks, slightly beaten
  • 1 cup half-and-half
  • 1/4 cup (1/2 stick) melted butter
  • 1 teaspoon vanilla extract
  • 1/2 teaspoon ground cinnamon
  • 1/4 teaspoon ground ginger, optional
  • 1 piece pre-made pie dough
  • Whipped cream, for topping

Directions

Preheat the oven to 350 degrees F.

Place 1 piece of pre-made pie dough down into a (9-inch) pie pan and press down along the bottom and all sides. Pinch and crimp the edges together to make a pretty pattern. Put the pie shell back into the freezer for 1 hour to firm up. Fit a piece of aluminum foil to cover the inside of the shell completely. Fill the shell up to the edges with pie weights or dried beans (about 2 pounds) and place it in the oven. Bake for 10 minutes, remove the foil and pie weights and bake for another 10 minutes or until the crust is dried out and beginning to color.

For the filling, in a large mixing bowl, beat the cream cheese with a hand mixer. Add the pumpkin and beat until combined. Add the sugar and salt, and beat until combined. Add the eggs mixed with the yolks, half-and-half, and melted butter, and beat until combined. Finally, add the vanilla, cinnamon, and ginger, if using, and beat until incorporated.

Pour the filling into the warm prepared pie crust and bake for 50 minutes (I baked it for 65 mins), or until the center is set. Place the pie on a wire rack and cool to room temperature. Cut into slices and top each piece with a generous amount of whipped cream.